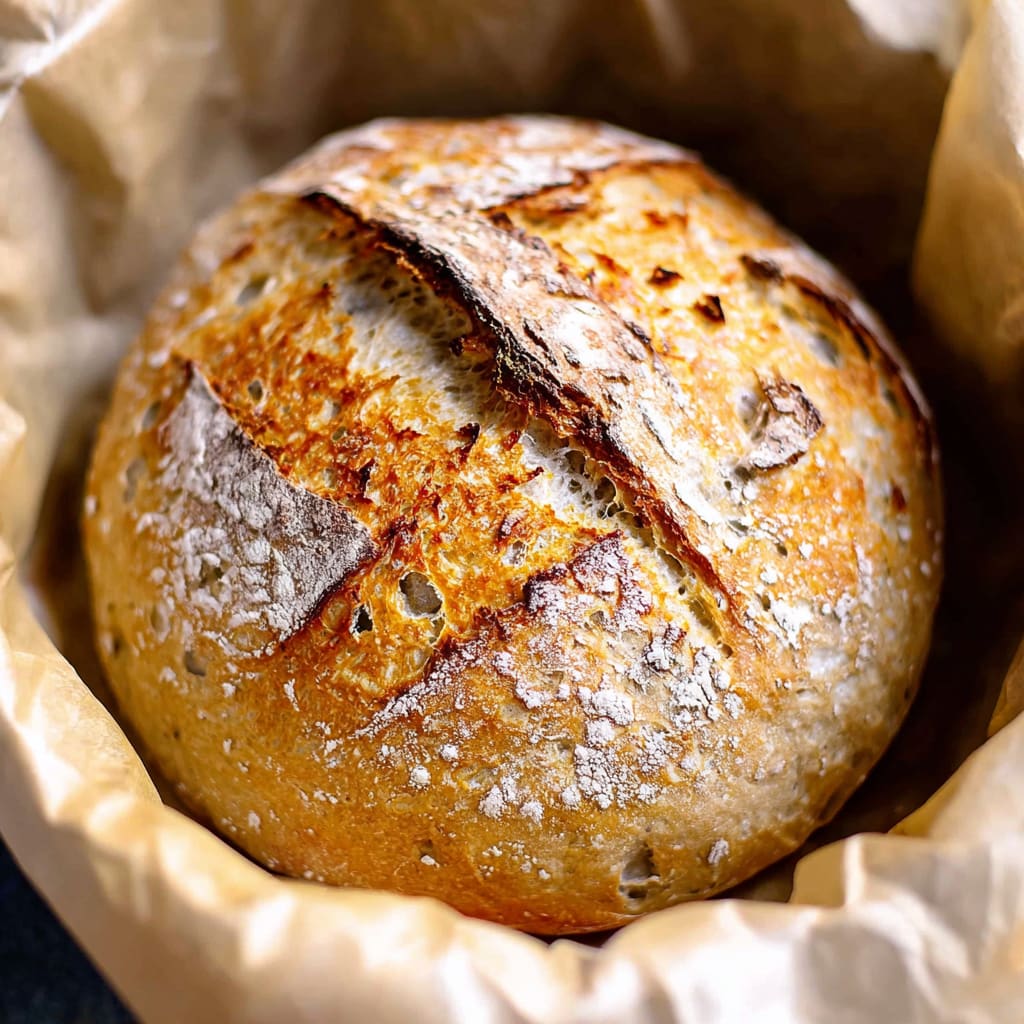
Imagine pulling a perfectly golden, crackling loaf of Dutch Oven No Knead Bread from your oven, steam rising as the rustic crust gives way to reveal a tender, airy interior. This miraculous bread requires virtually no effort yet delivers bakery-quality results that will make your kitchen smell like heaven. The magic lies in the long fermentation process and the heat-trapping capabilities of a Dutch oven, which create that enviable crisp exterior that professional bakers strive for. You’ll learn how this deceptively simple recipe transforms just flour, water, yeast, and salt into an artisanal loaf that rivals anything from your local bakery—all without the fuss of kneading.
Why You’ll Love This Recipe
This Dutch Oven No Knead Bread will become your go-to bread recipe for countless reasons. First, it’s virtually foolproof—even first-time bread makers achieve stunning results. The contrast between the crackly, golden-brown exterior and the soft, chewy interior creates a texture experience that store-bought bread simply can’t match. The open crumb structure provides perfect pockets for capturing melted butter, olive oil, or the juices from your favorite soup.
What truly sets this bread apart is the hands-off approach. Unlike traditional bread that demands vigorous kneading and careful timing, this no knead method lets time do the work for you. The long fermentation not only simplifies the process but also develops a complex, slightly tangy flavor reminiscent of sourdough. Plus, the basic ingredients are likely already in your pantry, making this an economical option that delivers gourmet results without specialty flours or equipment beyond your Dutch oven.
The versatility of this crusty homemade bread makes it perfect for everything from artisanal sandwiches to the ideal companion for your favorite stew—truly a kitchen miracle in loaf form.
Ingredients List for the Dutch Oven No Knead Bread
This Dutch Oven No Knead Bread relies on just four simple ingredients that work together through time and temperature to create bread magic. The proportion of water to flour creates the perfect consistency, while the salt and yeast bring flavor and essential rise to this rustic loaf.
- 1 1/2 cups warm water (about 100 degrees F)
- 1 packet yeast (active dry, instant, or quick rise- 2.25 teaspoons)
- 1 ½ teaspoons fine grain salt
- 3 1/4 cups all-purpose flour
Pro Tips
Achieving the perfect Dutch Oven No Knead Bread comes down to understanding a few critical techniques. First, temperature matters—your water should be warm (around 100°F), not hot, which would kill the yeast, and not cold, which would slow fermentation. Use a thermometer if you’re unsure, as proper temperature ensures proper rising.
Second, don’t worry about the sticky consistency of your dough—this high-hydration mixture is intentional and creates those beautiful air pockets in your finished loaf. Resist the urge to add more flour just to make it easier to handle. Instead, use a silicone spatula or wet hands when shaping to prevent sticking.
Finally, preheating your Dutch oven is non-negotiable. The extremely hot surface of the pot creates instant steam when the dough hits it, which is the secret to developing that bakery-quality crust. Allow the Dutch oven to heat for at least 20-30 minutes after your oven reaches temperature. This seemingly small step makes the difference between good bread and great bread with that professional crackling crust everyone desires in a rustic no knead loaf.
Instructions
Step 1: In a large bowl (or container), mix together the 1 1/2 cups warm water, 1 packet yeast (or 2.25 teaspoons), and 1 ½ teaspoons fine grain salt, until yeast and salt are fully or almost dissolved (I like using a whisk for this).
Step 2: Add the 3 1/4 cups all-purpose flour to the bowl all at once and stir together until a sticky dough forms. Don’t worry about mixing it too much, just make sure everything is uniformly wet. It WILL be messy and sticky. You can scrape what’s left on the spoon with a silicone spatula. (photo below provided for what the texture should look like – if it seems too wet, add 1-2 tablespoons more flour at a time until it is more like the photo. If it seems too dry, do the same thing with more water).
Step 3: Cover the bowl with a kitchen towel (or place the container to the lid on ajar). Leave it for 2-3 hours to rise in a somewhat warm place until it’s doubled in volume, like photo in previous step (If it’s cold out, I like to preheat my oven for a few minutes, then turn it off, then place the bowl in the oven, trapping the heat inside. If your house is warm just leave it out, or if it’s warm outside you can place it there).
Step 4: After the two-three hour rise time when the dough has about doubled, you have two options: bake, or store in the fridge. See notes for how to store.
Step 5: 30 minutes to an hour before you are ready to bake, preheat your oven to 450 degrees F. Place your Dutch oven in the oven, with the lid ON, while the oven is preheating. Once the oven reaches 450, keep it preheating for another 20 minutes, so the Dutch oven gets good and hot.
Step 6: Scrape the dough into the edge of a piece of parchment paper dusted with flour. Make it into as much of a “loaf” shape as you can by folding the edges up on top of it (a silicone spatula works well for this).
Step 7: Then, use the edges of the parchment paper to flip the loaf over so the floured side is on top and the loaf is in the center of the parchment paper. Don’t worry about it looking beautiful or smooth on top. My Dutch oven is an oval, so I made an oval shape. You can do a circle if yours is round.
Step 8: Optional: use a very sharp knife or clean razor blade to cut a few slits across the top of the loaf about 1/2″ deep, across the entire top. I did this in a cross shape for mine.
Step 9: Take out the preheated Dutch oven and take off the lid, carefully! Grab the parchment from the sides and place the loaf in your Dutch oven.
Step 10: Place the cover back on the Dutch oven and place in the preheated oven on the center rack. Bake for 35 minutes at 450 degrees F (40 minutes if dough was cold from the fridge). Remove the lid and bake for another 5-10 minutes, until a golden brown color forms- longer if necessary. Remove the loaf from the dutch oven (grabbing the sides of the parchment paper works well here) and place it on a wire rack or cutting board to cool for at least 10 minutes (preferably 30 minutes – an hour, if you have time) before slicing.
Variations
The beauty of this basic Dutch Oven No Knead Bread recipe is how easily it can be customized. For a hearty Rosemary Garlic version, add 2 tablespoons of fresh chopped rosemary and 4 minced garlic cloves to the initial dough mixture. The heat from baking will release the aromatic oils, creating an intoxicating scent throughout your kitchen.
For those who prefer whole grains, replace 1 cup of all-purpose flour with whole wheat flour for added nutrition and a nuttier flavor profile. This creates a slightly denser easy no knead bread with more depth of character. Just be aware that the dough might require a touch more water due to the whole wheat flour’s higher absorption rate.
Looking for something sweet? Transform your crusty homemade bread by adding 1/2 cup dried cranberries and 1/3 cup chopped walnuts to the dough. This creates a delightful breakfast bread that toasts beautifully and pairs wonderfully with cream cheese or butter for a special morning treat.
Storage and Serving
Your freshly baked Dutch Oven No Knead Bread will maintain its best texture for about 2-3 days when stored properly. Once completely cooled, place it in a paper bag or wrap it loosely in a clean kitchen towel to preserve that crisp crust while keeping the interior moist. Avoid plastic bags, which will soften your perfectly crispy crust. For longer storage, slice the entire loaf and freeze it in a zip-top bag for up to three months, toasting slices as needed straight from frozen.
This rustic bread shines when served alongside hearty soups and stews, where its sturdy crust and open crumb structure are perfect for sopping up flavorful broths. For an elevated appetizer, slice it thickly, toast lightly, and serve with high-quality olive oil and flaky sea salt. It also makes exceptional sandwiches—try it with layers of ripe tomato, fresh mozzarella, and basil for a simple yet spectacular lunch that showcases the bread’s flavor and texture.
FAQs
Can I use bread flour instead of all-purpose flour?
Yes! Bread flour will give your Dutch Oven No Knead Bread even more structure and a slightly chewier texture due to its higher protein content. The recipe works perfectly with either type of flour.
My dough seems too wet—is that normal?
Absolutely. This no knead dough is intentionally wet and sticky—that high hydration is what creates those beautiful air pockets in the finished loaf. Resist adding too much extra flour, as it will change the texture of your bread.
Can I make this bread without a Dutch oven?
While a Dutch oven creates the ideal environment for perfect crust development, you can use any oven-safe pot with a tight-fitting lid. Some bakers even use a pizza stone with a large metal bowl as a makeshift lid.
How do I know when my bread is done baking?
Beyond the golden-brown color, the most reliable method is to tap the bottom of the loaf—it should sound hollow. Alternatively, an instant-read thermometer inserted into the center should read 205-210°F.
Can I add ingredients like cheese or olives to my dough?
Absolutely! Add up to 1 cup of mix-ins like grated cheese, chopped olives, or dried herbs when you mix the dough initially. Just be aware that very wet additions might require a small amount of additional flour to maintain the proper consistency.
Dutch Oven No Knead Bread
- Prep Time: 15 mins
- Cook Time: 30 mins
- Total Time: 45 mins
- Yield: 4 people 1x
- Category: Dinner
- Method: Cooking
- Cuisine: American
Description
Learn how to make delicious Dutch Oven No Knead Bread at home with this easy recipe. Discover the secret to perfect artisan bread today!
Ingredients
- 1 1/2 cups warm water (about 100 degrees F)
- 1 packet yeast (active dry, instant, or quick rise- 2.25 teaspoons)
- 1 ½ teaspoons fine grain salt
- 3 1/4 cups all-purpose flour
Instructions
- Step 1: In a large bowl (or container), mix together the 1 1/2 cups warm water, 1 packet yeast (or 2: 25 teaspoons), and 1 ½ teaspoons fine grain salt, until yeast and salt are fully or almost dissolved (I like using a whisk for this).
- Step 2: Add the 3 1/4 cups all-purpose flour to the bowl all at once and stir together until a sticky dough forms. Don’t worry about mixing it too much, just make sure everything is uniformly wet. It WILL be messy and sticky. You can scrape what’s left on the spoon with a silicone spatula. (photo below provided for what the texture should look like – if it seems too wet, add 1-2 tablespoons more flour at a time until it is more like the photo. If it seems too dry, do the same thing with more water).
- Step 3: Cover the bowl with a kitchen towel (or place the container to the lid on ajar). Leave it for 2-3 hours to rise in a somewhat warm place until it’s doubled in volume, like photo in previous step (If it’s cold out, I like to preheat my oven for a few minutes, then turn it off, then place the bowl in the oven, trapping the heat inside. If your house is warm just leave it out, or if it’s warm outside you can place it there).
- Step 4: After the two-three hour rise time when the dough has about doubled, you have two options: bake, or store in the fridge. See notes for how to store.
- Step 5: 30 minutes to an hour before you are ready to bake, preheat your oven to 450 degrees F. Place your Dutch oven in the oven, with the lid ON, while the oven is preheating. Once the oven reaches 450, keep it preheating for another 20 minutes, so the Dutch oven gets good and hot.
- Step 6: Scrape the dough into the edge of a piece of parchment paper dusted with flour. Make it into as much of a “loaf” shape as you can by folding the edges up on top of it (a silicone spatula works well for this).
- Step 7: Then, use the edges of the parchment paper to flip the loaf over so the floured side is on top and the loaf is in the center of the parchment paper. Don’t worry about it looking beautiful or smooth on top. My Dutch oven is an oval, so I made an oval shape. You can do a circle if yours is round.
- Step 8: Optional: use a very sharp knife or clean razor blade to cut a few slits across the top of the loaf about 1/2″ deep, across the entire top. I did this in a cross shape for mine.
- Step 9: Take out the preheated Dutch oven and take off the lid, carefully! Grab the parchment from the sides and place the loaf in your Dutch oven.
- Step 10: Place the cover back on the Dutch oven and place in the preheated oven on the center rack. Bake for 35 minutes at 450 degrees F (40 minutes if dough was cold from the fridge). Remove the lid and bake for another 5-10 minutes, until a golden brown color forms- longer if necessary. Remove the loaf from the dutch oven (grabbing the sides of the parchment paper works well here) and place it on a wire rack or cutting board to cool for at least 10 minutes (preferably 30 minutes – an hour, if you have time) before slicing.
Notes
Try This Recipe and Leave a comment Below, your opinion matters to me!
Nutrition
- Serving Size: 4 serving
- Calories: 400
- Sugar: 5g
- Sodium: 400mg
- Fat: 10g
- Saturated Fat: 3g
- Unsaturated Fat: 7g
- Trans Fat: 0g
- Carbohydrates: 40g
- Fiber: 5g
- Protein: 15g
- Cholesterol: 50mg