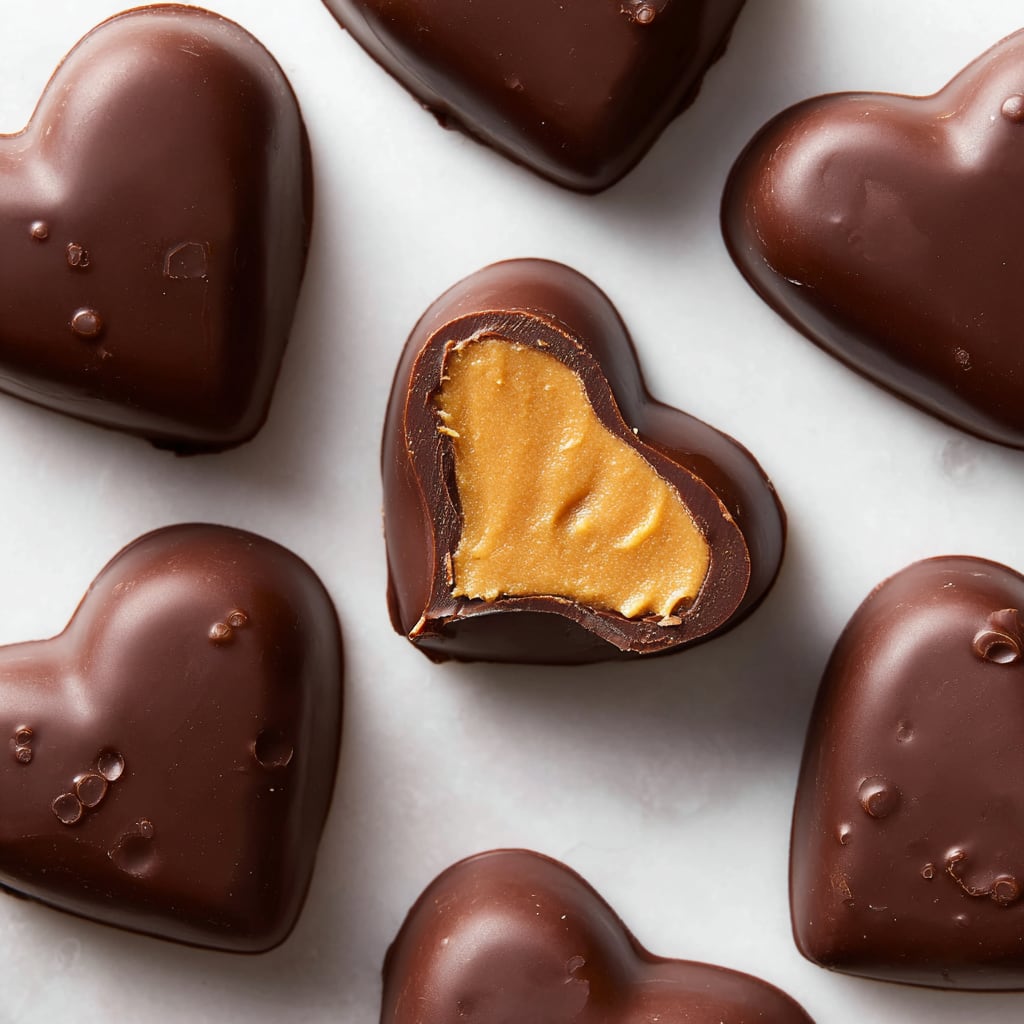
The irresistible combination of smooth, velvety chocolate embracing creamy peanut butter creates a symphony of flavors in these adorable Chocolate Peanut Butter Valentine Hearts. This decadent treat strikes the perfect balance between rich chocolate and nutty peanut butter, crafted into charming heart shapes that speak the universal language of love. Whether you’re surprising your significant other, treating your friends, or simply indulging yourself this Valentine’s Day, these delightful confections deliver both impressive presentation and mouthwatering taste. You’ll learn how to create these professional-looking chocolate hearts with simple ingredients and techniques that anyone can master.
Why You’ll Love This Recipe
These Chocolate Peanut Butter Valentine Hearts are guaranteed to become your new favorite homemade treat for several compelling reasons. First, they offer that perfect textural contrast – a satisfying snap of chocolate shell giving way to a luscious, creamy peanut butter center that melts in your mouth. The flavor combination is timeless and crave-worthy, appealing to both chocolate enthusiasts and peanut butter lovers alike.
What’s more, despite their impressive appearance, these treats require no special equipment or advanced baking skills. With just a handful of ingredients and a heart-shaped mold (or even a simple parchment paper piping technique), you can create professional-looking confections that rival store-bought chocolates at a fraction of the cost.
The versatility of these chocolate hearts makes them perfect for customizing to your taste preferences or dietary needs. Plus, they can be made ahead of time, reducing holiday stress and allowing you to focus on creating special moments with your loved ones. The combination of visual appeal, delicious flavor, and relative ease makes these valentine treats irresistible.
Ingredients
For the Chocolate Shell:
- 8 oz (226g) high-quality semi-sweet chocolate, chopped
- 1 tbsp (15ml) coconut oil or shortening
For the Peanut Butter Filling:
- ½ cup (125g) smooth peanut butter
- 2 tbsp (28g) unsalted butter, softened
- ¾ cup (90g) powdered sugar
- ¼ tsp vanilla extract
- Pinch of salt
For Decoration (Optional):
- 2 oz (56g) white chocolate, melted
- Red or pink food coloring
- Sprinkles or edible glitter
The quality of chocolate significantly impacts the final result – opt for bars rather than chips when possible, as they melt more smoothly. Natural peanut butter works but may require additional powdered sugar to achieve the right consistency. The coconut oil helps thin the chocolate for easier working while ensuring a beautiful shine and clean snap when bitten into.
Pro Tips
Proper Chocolate Tempering
The secret to professional-looking Chocolate Peanut Butter Valentine Hearts lies in properly melting your chocolate. Use a double boiler method by placing a heat-safe bowl over a pot of simmering (not boiling) water. Ensure no water touches the chocolate, as even a drop can cause it to seize. Alternatively, microwave in 30-second intervals at 50% power, stirring between each interval. The chocolate should feel smooth and lukewarm to the touch—if it’s too hot, it won’t set properly or may become streaky.
Creating the Perfect Filling Texture
For that ideal peanut butter center, beat the filling ingredients until they reach a play-dough-like consistency. If your mixture is too sticky, add more powdered sugar one tablespoon at a time. If it’s too dry, incorporate a small amount of additional peanut butter. The perfect filling should hold its shape when rolled between your fingers but remain soft enough to press into molds without crumbling.
Achieving Clean Release from Molds
Before pouring chocolate into heart molds, ensure they’re completely clean and dry. For silicone molds, refrigerate (don’t freeze) filled molds for 15-20 minutes before attempting to remove the chocolates. For plastic molds, place in the freezer for 5 minutes then let sit at room temperature for 2 minutes before gently flexing to release. This prevents condensation while ensuring the chocolate contracts enough to release cleanly.
Instructions
Step 1: Prepare the Peanut Butter Filling
In a medium bowl, combine the smooth peanut butter and softened butter. Using an electric mixer on medium speed, beat until completely incorporated and creamy. Gradually add the powdered sugar, mixing on low speed initially to prevent a sugar cloud, then increase to medium once incorporated. Mix in the vanilla extract and salt until the mixture becomes thick and somewhat firm. It should hold its shape when rolled into a ball. Cover the bowl with plastic wrap and refrigerate for 20-30 minutes to firm up further.
Step 2: Prepare the Chocolate Shell
While the filling chills, prepare your chocolate. Place the chopped chocolate and coconut oil in a heat-safe bowl. Either use the double-boiler method described in the pro tips or microwave in 30-second intervals at 50% power, stirring between each until completely smooth. The melted chocolate should be glossy and pour like thick syrup. Let it cool slightly until just warm to the touch before using.
Step 3: Create the Chocolate Hearts
If using silicone heart molds, spoon about 1-2 teaspoons of melted chocolate into each cavity. Using a small pastry brush or the back of a small spoon, carefully push the chocolate up the sides of each mold, ensuring complete coverage with a thin, even layer. Turn the mold upside down over your bowl of chocolate to let excess drip off, then use a straight edge to scrape across the top, creating clean edges. Place the mold in the refrigerator for 10 minutes to set.
Step 4: Add the Filling and Seal
Once the chocolate shells have firmed up, remove the peanut butter mixture from the refrigerator. Take small portions (about 1 teaspoon) and roll into balls. Gently flatten each ball and place into the chocolate shells, leaving about 1/8 inch of space at the top. Press the filling down gently to remove any air pockets. Reheat your remaining chocolate if it has started to thicken, then spoon over each filled mold to seal. Use a straight edge to scrape across the top for a flat bottom. Return to the refrigerator for at least 30 minutes to fully set.
Step 5: Unmold and Decorate
Once completely set, carefully flex the silicone mold to release the Chocolate Peanut Butter Valentine Hearts. If using white chocolate for decoration, melt it using the same gentle heating method as before. You can color a portion with red or pink food coloring if desired. Transfer to a small piping bag with a very fine tip (or use a plastic bag with a tiny corner snipped off) and drizzle decoratively over the hearts. Add sprinkles immediately if using, before the chocolate decoration sets. Allow decorated hearts to set for 10 minutes before serving or packaging.
Variations
Dark Chocolate Raspberry Hearts
Replace the peanut butter filling with a raspberry buttercream by combining 4 tablespoons of softened butter with 1 cup powdered sugar, 2 tablespoons of raspberry preserves, and ½ teaspoon of raspberry extract. The tangy sweetness of raspberry pairs beautifully with the rich chocolate exterior while maintaining the romantic red theme perfect for Valentine’s Day.
White Chocolate Cookies and Cream Hearts
Swap the semi-sweet chocolate for white chocolate in the shell and enhance the peanut butter filling by mixing in 2 tablespoons of crushed chocolate sandwich cookies. You can also use a pure cookie crumb filling by combining 1 cup finely crushed chocolate cookies with 3 tablespoons of cream cheese and ¼ cup powdered sugar for a cookies-and-cream variation.
Vegan Chocolate Hazelnut Hearts
Create a plant-based version by using vegan chocolate and replacing the peanut butter filling with a mixture of chocolate hazelnut spread (like a dairy-free Nutella alternative), 2 tablespoons coconut oil, and ½ cup powdered sugar. This variation offers all the decadence of the original while accommodating those following a vegan diet.
Storage and Serving
Your Chocolate Peanut Butter Valentine Hearts will stay fresh for up to two weeks when stored in an airtight container in a cool, dry place. Avoid storing in the refrigerator as this can cause condensation when removed, resulting in a cloudy appearance on the chocolate. If your home is particularly warm, you may store them in the refrigerator, but allow them to come to room temperature for about 20 minutes before serving for the best flavor and texture experience.
For an elegant presentation, arrange these chocolate hearts on a white porcelain plate drizzled with a thin line of melted chocolate or raspberry sauce. They make beautiful accompaniments to after-dinner coffee or champagne for a romantic evening. For a more elaborate dessert, place several hearts around a scoop of vanilla ice cream and garnish with fresh berries for a special Valentine’s dessert platter that’s sure to impress.
These chocolate hearts also make thoughtful gifts – place them in decorative paper cups and arrange in a gift box lined with tissue paper for a homemade treat that rivals expensive store-bought chocolates.
FAQs
Can I use natural peanut butter for this recipe?
Yes, you can use natural peanut butter, but you’ll likely need to add extra powdered sugar (about 2-3 tablespoons more) to achieve the right consistency since natural varieties are typically runnier than conventional ones. Make sure to stir it well before measuring.
What if I don’t have heart-shaped molds?
No worries! You can create free-form hearts by piping thick outlines of chocolate onto parchment paper, letting them set, filling with the peanut butter mixture, then sealing with more chocolate. Alternatively, line a small square pan with parchment, make a layered bar (chocolate, peanut butter, chocolate), then cut with a heart-shaped cookie cutter once set.
Can these be made ahead of time?
Absolutely! These Chocolate Peanut Butter Valentine Hearts can be made up to two weeks in advance when stored properly in an airtight container at cool room temperature.
Why did my chocolate develop white streaks?
Those white streaks, called “bloom,” typically occur when chocolate experiences temperature fluctuations or wasn’t properly tempered. While it’s purely cosmetic and doesn’t affect taste, you can avoid this by keeping the chocolate at consistent temperatures and adding coconut oil to stabilize it.
Can I freeze these chocolate hearts?
Yes, they freeze well for up to three months. Wrap them individually in parchment paper, then place in a freezer-safe container. Thaw at room temperature for about an hour before serving.

Chocolate Peanut Butter Valentines Heart
- Prep Time: 30 minutes
- Cook Time: 0 minutes
- Total Time: 1 hour
- Yield: 12 hearts 1x
- Category: Dessert
- Method: Mixing, Melting, Chilling
- Cuisine: Americaine
Description
Chocolate Peanut Butter Valentines Heart is a decadent treat made with rich chocolate and creamy peanut butter – a perfect indulgence for your sweetheart!
Ingredients
- 8 oz (226g) high-quality semi-sweet chocolate, chopped
- 1 tbsp (15ml) coconut oil or shortening
- ½ cup (125g) smooth peanut butter
- 2 tbsp (28g) unsalted butter, softened
- ¾ cup (90g) powdered sugar
- ¼ tsp vanilla extract
- Pinch of salt
- 2 oz (56g) white chocolate, melted
- Red or pink food coloring
- Sprinkles or edible glitter
Instructions
- Step 1: Prepare the Peanut Butter Filling In a medium bowl, combine the smooth peanut butter and softened butter. Using an electric mixer on medium speed, beat until completely incorporated and creamy. Gradually add the powdered sugar, mixing on low speed initially to prevent a sugar cloud, then increase to medium once incorporated. Mix in the vanilla extract and salt until the mixture becomes thick and somewhat firm. It should hold its shape when rolled into a ball. Cover the bowl with plastic wrap and refrigerate for 20-30 minutes to firm up further.
- Step 2: Prepare the Chocolate Shell While the filling chills, prepare your chocolate. Place the chopped chocolate and coconut oil in a heat-safe bowl. Either use the double-boiler method described in the pro tips or microwave in 30-second intervals at 50% power, stirring between each until completely smooth. The melted chocolate should be glossy and pour like thick syrup. Let it cool slightly until just warm to the touch before using.
- Step 3: Create the Chocolate Hearts If using silicone heart molds, spoon about 1-2 teaspoons of melted chocolate into each cavity. Using a small pastry brush or the back of a small spoon, carefully push the chocolate up the sides of each mold, ensuring complete coverage with a thin, even layer. Turn the mold upside down over your bowl of chocolate to let excess drip off, then use a straight edge to scrape across the top, creating clean edges. Place the mold in the refrigerator for 10 minutes to set.
- Step 4: Add the Filling and Seal Once the chocolate shells have firmed up, remove the peanut butter mixture from the refrigerator. Take small portions (about 1 teaspoon) and roll into balls. Gently flatten each ball and place into the chocolate shells, leaving about 1/8 inch of space at the top. Press the filling down gently to remove any air pockets. Reheat your remaining chocolate if it has started to thicken, then spoon over each filled mold to seal. Use a straight edge to scrape across the top for a flat bottom. Return to the refrigerator for at least 30 minutes to fully set.
- Step 5: Unmold and Decorate Once completely set, carefully flex the silicone mold to release the **Chocolate Peanut Butter Valentine Hearts**. If using white chocolate for decoration, melt it using the same gentle heating method as before. You can color a portion with red or pink food coloring if desired. Transfer to a small piping bag with a very fine tip (or use a plastic bag with a tiny corner snipped off) and drizzle decoratively over the hearts. Add sprinkles immediately if using, before the chocolate decoration sets. Allow decorated hearts to set for 10 minutes before serving or packaging.
Notes
Fresh ingredients will always yield the best flavor results.
Nutrition
- Serving Size: 1 heart
- Calories: 180
- Sugar: 12g
- Sodium: 55mg
- Fat: 12g
- Saturated Fat: 6g
- Unsaturated Fat: 4g
- Trans Fat: 0g
- Carbohydrates: 18g
- Fiber: 2g
- Protein: 3g
- Cholesterol: 5mg