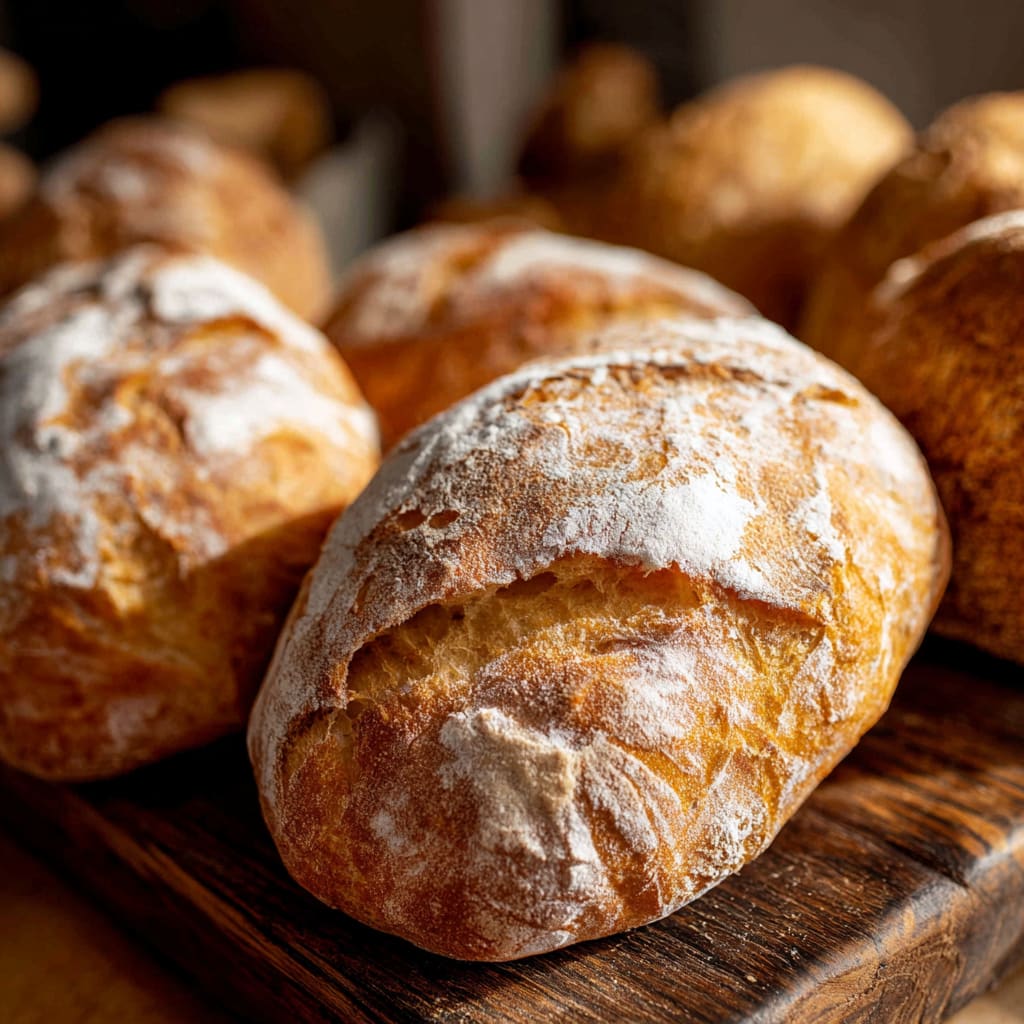
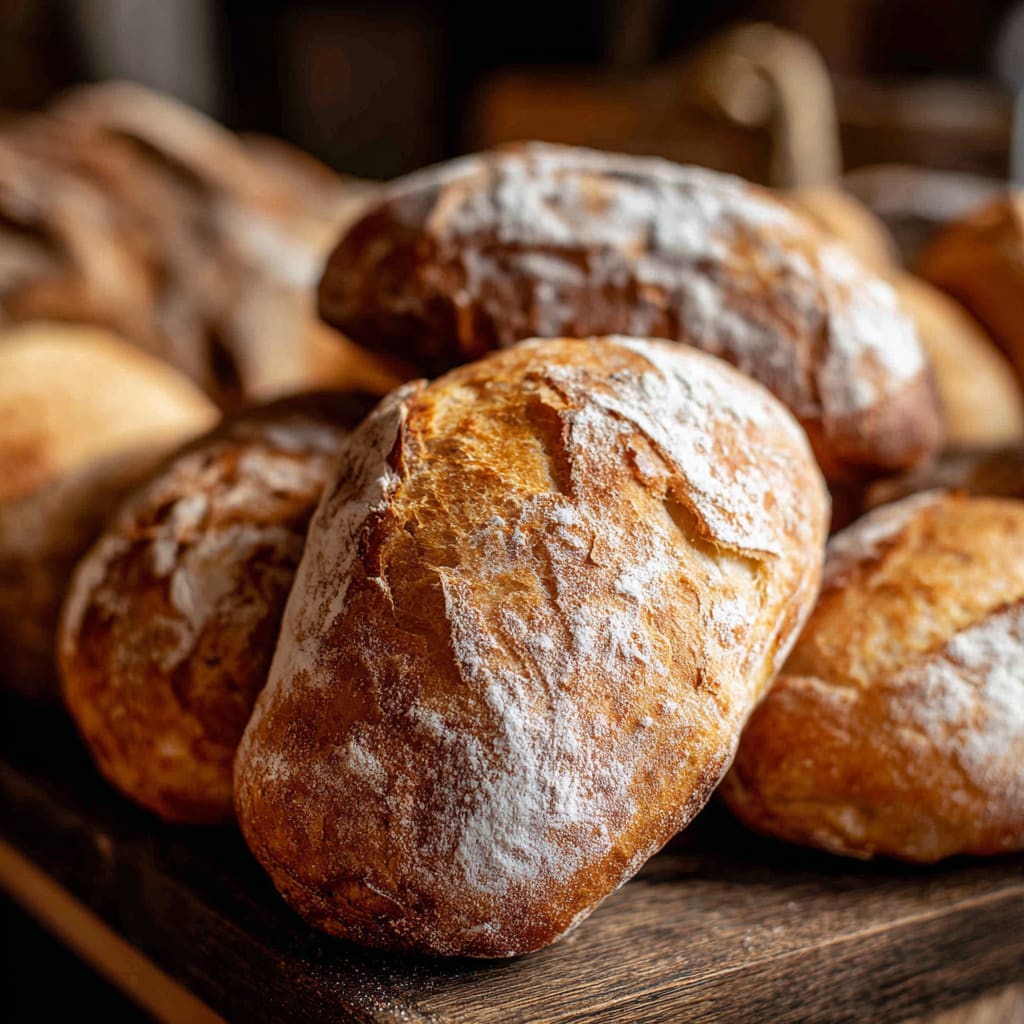
Imagine biting into a Easy Small Batch Ciabatta Roll with its crackling crust giving way to a tender, airy interior filled with those signature irregular holes that make ciabatta so distinctive. These rustic Italian-style rolls deliver an irresistible contrast of textures and a subtle, yeasty aroma that makes them the perfect companion for soups, sandwiches, or simply dipped in olive oil. The beauty of these Easy Small Batch Ciabatta Rolls is that you don’t need a professional baker’s kitchen to create them – just a few simple ingredients and a bit of patience. You’ll learn how to achieve that authentic ciabatta texture at home with minimal effort, perfect for when you want freshly baked bread without making a large batch.
Why You’ll Love This Recipe
These Easy Small Batch Ciabatta Rolls will quickly become a staple in your baking repertoire for several compelling reasons. First, the small batch aspect means you’ll have perfectly fresh rolls without leftovers going stale. The recipe creates just 4-5 rolls – ideal for a family dinner or a couple of sandwich lunches.
The contrast between the crisp, flour-dusted exterior and the chewy, open-crumbed interior creates an irresistible textural experience that elevates any meal. Despite their artisanal appearance, these homemade ciabatta bread rolls require no special equipment – just your hands and a bowl.
Perhaps most appealingly, this recipe is incredibly forgiving for beginners. The high-hydration dough might seem intimidating, but the stretch-and-fold technique makes handling it surprisingly manageable. You’ll experience the satisfaction of creating bakery-quality ciabatta bread at home with minimal ingredients and straightforward techniques.
The versatility of these small batch rolls means they can transform an ordinary meal into something special, whether used for gourmet sandwiches, alongside pasta, or as vehicles for sopping up soup or sauce.
Ingredients List for the Easy Small Batch Ciabatta Rolls
These few simple ingredients combine to create magic in the form of artisanal bread. The high hydration ratio (80% water to flour) is what gives these rolls their characteristic open, airy texture that defines authentic ciabatta.
- 1 teaspoon instant yeast
- 240 grams water, at room temperature (approximately 1 cup)
- 300 grams all-purpose flour (approximately 2.5 cups)
- 1 teaspoon salt
Pro Tips
Achieving perfect Easy Small Batch Ciabatta Rolls relies on a few crucial techniques. First, resist the urge to add more flour even though the dough seems excessively wet. This high hydration level (80%) is essential for creating those beautiful irregular holes in the finished bread. Trust the process – the dough will become more manageable after each stretch-and-fold sequence.
Temperature management is critical for proper fermentation. If your kitchen is cold (below 70°F), consider placing the covered dough near a warm spot or in an oven with just the light turned on. Conversely, if your kitchen is very warm, keep an eye on the dough as it may rise faster than expected. The dough should roughly double in size after the stretch-and-fold sequences.
Finally, creating steam in your oven is non-negotiable for achieving that crackling crust. The water pan at the bottom of the oven and spraying water over the dough creates the steam environment that professional bakeries use. If your oven tends to run hot or cool, consider using an oven thermometer to ensure you’re baking at the precise temperature needed for these homemade ciabatta rolls.
Instructions
Prepare the Dough (1 hour rise time):
1. In small cup, dissolve instant yeast in lukewarm water and stir to mix together (the mixture should start to bubble and develop a yeasty aroma). Let it sit for 2 minutes.
2. In a large bowl, add flour and salt. Pour in yeast mixture and whisk until fully combined, scraping down the sides of the bowl (there should be no dry flour particles visible). The mixture is very sticky and wet, with an 80% hydration (flour to water ratio).
3. Cover the bowl with plastic wrap and let it sit at room temperature for 1 hour (Note that a higher room temperature will speed up the fermentation process and will cause the dough to rise faster).
Stretch and Fold the Dough (1.5 hour rise time):
1. Apply some water onto your hands and stretch and fold the dough in the bowl by folding the edges into the centre, one edge at a time. Wet hands make it easier to work with the dough and it should take you less than a minute to fold all 4 sides. Cover with plastic wrap and let the dough rest for 30 minutes.
2. Repeat this stretch and fold step, then cover with plastic wrap and let the dough rest for another 30 minutes. Then, repeat the stretch and fold step a final time and let it rest for another 30 minutes. After 3 rounds of stretch and folds with 30 minute resting periods, the dough will rise and approximately double in size.
Shape the Dough (40 minutes rise time):
1. Transfer dough to a floured surface. Note that the dough will still be very sticky and that is okay. Sprinkle dough with a little flour and shape it into a rectangle by gently pulling the dough from underneath. Be careful not to press the dough because the air holes trapped inside might get squeezed out.
2. Roll the dough into a log and press the edge to seal. Divide the rolled dough into 4-5 equal parts, and place each piece at least two inches apart, onto a well-floured work surface. Let the dough rest for about 40 minutes. This is called the final proofing.
Bake the Ciabatta Rolls:
1. Carefully transfer each dough onto a parchment-lined 8×12-inch baking tray. Because the dough is still quite sticky, dust with flour to help with handling it. Set aside.
2. Fill a baking pan with water and place it in the bottom of your oven. Preheat the oven to 420 F, and allow it to fill with steam from the water. When the oven is ready, slide the baking tray in and spray some water over the dough immediately. Bake for 20 minutes.
3. Let the bread cool for 20 minutes. To check if the bread is done, you can tap the bottom of the bread with your finger. The bread will sound hollow when they are done.
Variations
The versatility of these Easy Small Batch Ciabatta Rolls makes them perfect for creative variations. For a Mediterranean twist, fold in 1/4 cup of pitted and chopped olives and 1 tablespoon of fresh rosemary during the final stretch-and-fold. The oils from the olives will infuse the bread with rich flavor while maintaining that classic ciabatta texture.
For a heartier version, substitute 1/3 of the all-purpose flour with whole wheat flour. This creates a more rustic small batch ciabatta with a nuttier flavor profile, though the crumb will be slightly less open. You may need to add an additional tablespoon of water to maintain the proper hydration level.
For a cheesy variation that’s perfect for sandwiches, incorporate 1/3 cup of grated Parmesan or Asiago cheese during the final fold. The cheese will create delicious pockets of flavor throughout your homemade ciabatta bread rolls without compromising the structure.
Storage and Serving
These Easy Small Batch Ciabatta Rolls are best enjoyed the day they’re baked when the contrast between the crisp crust and chewy interior is at its peak. However, they can be stored in a paper bag at room temperature for up to 2 days. Avoid plastic storage bags as they’ll soften the crust and potentially create moisture issues.
To revive day-old rolls, sprinkle them lightly with water and heat in a 350°F oven for 5-7 minutes until the crust crisps up again. For longer storage, freeze the completely cooled rolls in a freezer bag for up to 1 month and thaw at room temperature before reheating.
These ciabatta rolls shine when split and used for substantial sandwiches – try them with Italian cold cuts, roasted vegetables, or a classic caprese combination. They’re also ideal for dipping into soup or serving alongside pasta to soak up flavorful sauces. For a simple appetizer, slice them crosswise, toast lightly, and serve with olive oil and balsamic vinegar for dipping.
FAQs
Why is my ciabatta dough so sticky?
This is completely normal! The high hydration (80% water to flour ratio) is what creates those signature holes in the crumb structure. Use wet hands when handling the dough and resist adding too much extra flour, which would make the rolls dense.
Can I use active dry yeast instead of instant yeast?
Yes, but you’ll need to proof it first. Use the same amount (1 teaspoon) but dissolve it in the water with a pinch of sugar and wait 5-10 minutes until foamy before proceeding with the recipe.
Why didn’t my ciabatta rolls get those big air holes?
The most common cause is either adding too much flour during shaping or degassing the dough by handling it too roughly. Be very gentle when shaping and make sure you’re maintaining the high hydration level.
Can I make these rolls ahead of time?
Yes, you can refrigerate the dough after the stretch-and-fold process for up to 24 hours. This slow fermentation actually enhances flavor. Bring it to room temperature before shaping.
Why do I need to create steam in the oven?
Steam allows the dough to expand fully before the crust sets, creating that signature crisp exterior. It’s an essential step for authentic Easy Small Batch Ciabatta Rolls and shouldn’t be skipped.

Easy Small Batch Ciabatta Rolls
- Prep Time: 15 mins
- Cook Time: 30 mins
- Total Time: 45 mins
- Yield: 4 people 1x
- Category: Lunch
- Method: Cooking
- Cuisine: American
Description
Discover how to make Easy Small Batch Ciabatta Rolls at home in no time. Perfect for your next meal!
Ingredients
- 1 teaspoon instant yeast
- 240 grams water, at room temperature (approximately 1 cup)
- 300 grams all-purpose flour (approximately 2.5 cups)
- 1 teaspoon salt
Instructions
Prepare the Dough (1 hour rise time):
- Step 1: In small cup, dissolve instant yeast in lukewarm water and stir to mix together (the mixture should start to bubble and develop a yeasty aroma). Let it sit for 2 minutes.
- Step 2: In a large bowl, add flour and salt. Pour in yeast mixture and whisk until fully combined, scraping down the sides of the bowl (there should be no dry flour particles visible). The mixture is very sticky and wet, with an 80% hydration (flour to water ratio).
- Step 3: Cover the bowl with plastic wrap and let it sit at room temperature for 1 hour (Note that a higher room temperature will speed up the fermentation process and will cause the dough to rise faster).
Stretch and Fold the Dough (1 : 5 hour rise time):
- Step 1: Apply some water onto your hands and stretch and fold the dough in the bowl by folding the edges into the centre, one edge at a time. Wet hands make it easier to work with the dough and it should take you less than a minute to fold all 4 sides. Cover with plastic wrap and let the dough rest for 30 minutes.
- Step 2: Repeat this stretch and fold step, then cover with plastic wrap and let the dough rest for another 30 minutes. Then, repeat the stretch and fold step a final time and let it rest for another 30 minutes. After 3 rounds of stretch and folds with 30 minute resting periods, the dough will rise and approximately double in size.
Shape the Dough (40 minutes rise time):
- Step 1: Transfer dough to a floured surface. Note that the dough will still be very sticky and that is okay. Sprinkle dough with a little flour and shape it into a rectangle by gently pulling the dough from underneath. Be careful not to press the dough because the air holes trapped inside might get squeezed out.
- Step 2: Roll the dough into a log and press the edge to seal. Divide the rolled dough into 4-5 equal parts, and place each piece at least two inches apart, onto a well-floured work surface. Let the dough rest for about 40 minutes. This is called the final proofing.
Bake the Ciabatta Rolls:
- Step 1: Carefully transfer each dough onto a parchment-lined 8×12-inch baking tray. Because the dough is still quite sticky, dust with flour to help with handling it. Set aside.
- Step 2: Fill a baking pan with water and place it in the bottom of your oven. Preheat the oven to 420 F, and allow it to fill with steam from the water. When the oven is ready, slide the baking tray in and spray some water over the dough immediately. Bake for 20 minutes.
- Step 3: Let the bread cool for 20 minutes. To check if the bread is done, you can tap the bottom of the bread with your finger. The bread will sound hollow when they are done.
Notes
Try This Recipe and Leave a comment Below, your opinion matters to me!
Nutrition
- Serving Size: 4 serving
- Calories: 400
- Sugar: 5g
- Sodium: 400mg
- Fat: 10g
- Saturated Fat: 3g
- Unsaturated Fat: 7g
- Trans Fat: 0g
- Carbohydrates: 40g
- Fiber: 5g
- Protein: 15g
- Cholesterol: 50mg