Imagine biting into a velvety, decadent Homemade Chocolate Truffle that melts luxuriously on your tongue, leaving behind an intense chocolate flavor that’s simply unforgettable. These bite-sized confections represent the perfect balance of simplicity and elegance—a treat that appears elaborate but requires surprisingly little effort to create. Homemade Chocolate Truffles have been delighting chocolate enthusiasts for generations, offering a customizable canvas for flavor experimentation that store-bought varieties simply can’t match. You’ll learn how to craft these indulgent chocolate gems with just a handful of high-quality ingredients and some simple techniques that yield professional-looking results every time.
Why You’ll Love This Recipe
These Homemade Chocolate Truffles will quickly become your go-to dessert for both special occasions and everyday indulgences. The contrast between the silky-smooth, rich ganache center and the textured exterior coating creates a delightful sensory experience in every bite. Unlike commercial chocolate confections, these truffles contain no preservatives or artificial ingredients—just pure chocolate goodness.
What makes this chocolate truffle recipe particularly appealing is its incredible versatility. Once you master the basic technique, you can customize your truffles with endless flavor combinations. Whether you prefer them rolled in cocoa powder for a classic finish or dipped in tempered chocolate for an elegant sheen, these truffles always impress.
The recipe is remarkably forgiving for beginners while still offering complexity for experienced candy makers. The process requires no special equipment beyond basic kitchen tools, and the hands-on rolling process proves oddly therapeutic—making this the perfect weekend project when you want to slow down and create something truly special.
Ingredients
For approximately 24 delicious Homemade Chocolate Truffles, you’ll need:
- 8 oz (226g) high-quality semisweet chocolate, finely chopped
- 2/3 cup (160ml) heavy cream
- 1 tablespoon (14g) unsalted butter, room temperature
- 1/4 teaspoon pure vanilla extract
- 1/8 teaspoon sea salt
For coating (choose one or mix and match):
- 1/3 cup (40g) unsweetened cocoa powder
- 1/3 cup (40g) finely chopped nuts (pistachios, hazelnuts, or almonds work beautifully)
- 1/3 cup (40g) shredded coconut
- 8 oz (226g) additional chocolate for dipping (optional)
The quality of chocolate dramatically influences your final result—aim for bars containing at least 60-70% cocoa solids rather than chocolate chips, which contain stabilizers that affect melting. Heavy cream with at least 36% fat content creates the optimal ganache texture, while fresh butter adds a subtle richness that elevates these chocolate truffles from good to extraordinary.
Pro Tips
Perfect Ganache Technique: The foundation of exceptional Homemade Chocolate Truffles lies in properly prepared ganache. Heat your cream just until tiny bubbles form around the edges—never allow it to boil vigorously as this can break the emulsion. Pour the hot cream over your chopped chocolate and let it sit undisturbed for 2-3 minutes before stirring. This patient approach allows the chocolate to melt evenly without introducing unwanted air bubbles that could affect the truffle’s texture.
Temperature Management: Chocolate is temperature-sensitive, and your working environment matters significantly. If your kitchen is warmer than 70°F (21°C), plan to refrigerate your ganache for longer periods between steps. Work in short sessions, returning the mixture to the refrigerator whenever it becomes too soft to handle. Conversely, if your ganache becomes too firm, let it sit at room temperature for 5-10 minutes before proceeding—never microwave or forcefully warm truffle mixture as this damages the emulsion.
Rolling Perfection: For professionally shaped truffles, use a small cookie scoop or melon baller to portion the ganache, then wear food-safe gloves lightly dusted with cocoa powder when rolling. The heat from your hands will slightly warm the ganache, creating a smoother surface. Roll quickly and confidently using your palms rather than your fingers for perfectly round shapes. If making larger batches, work with only a quarter of the mixture at a time while keeping the remainder refrigerated.
Instructions
Step 1: Prepare the Chocolate Base
Start by placing your finely chopped chocolate in a medium heatproof bowl. The smaller your chocolate pieces, the more evenly they’ll melt. In a small saucepan, heat the heavy cream over medium-low heat until it’s just steaming and tiny bubbles form around the edges. Immediately remove from heat and pour over the chocolate. Let this mixture sit undisturbed for 2-3 minutes to allow the chocolate to soften properly.
Step 2: Create the Ganache
Gently stir the chocolate and cream mixture, starting from the center and working outward in concentric circles until completely smooth and glossy. Avoid vigorous stirring which can introduce air bubbles. Once fully incorporated, add the room-temperature butter, vanilla extract, and salt. Stir until these ingredients are completely blended into your ganache. The mixture should look silky and homogeneous.
Step 3: Chill the Mixture
Cover the ganache directly with plastic wrap, ensuring the wrap touches the surface to prevent a skin from forming. Refrigerate for at least 2 hours or until the mixture is firm enough to scoop and hold its shape. For best results, leave it overnight—this resting period also enhances flavor development in your Homemade Chocolate Truffles.
Step 4: Shape the Truffles
Line a baking sheet with parchment paper. Prepare your coating ingredients in separate shallow dishes. Remove the ganache from the refrigerator and let it sit for 5 minutes to slightly soften. Using a teaspoon or small cookie scoop, portion out the ganache into roughly 1-inch balls. Quickly roll each portion between your palms to create smooth spheres, then immediately roll in your chosen coating until completely covered. Place each finished truffle on the prepared baking sheet.
Step 5: Set and Store
Return the coated truffles to the refrigerator for at least 15 minutes to set completely. Your Homemade Chocolate Truffles are now ready to enjoy! For the best texture and flavor experience, serve them slightly chilled but not completely cold—about 10 minutes at room temperature creates the perfect melt-in-your-mouth consistency.
Variations
Liqueur-Infused Chocolate Truffles: Create sophisticated flavor profiles by adding 1-2 tablespoons of your favorite liqueur to the ganache mixture. Grand Marnier creates vibrant orange-chocolate truffles, while Kahlúa enhances the natural coffee notes in dark chocolate. Amaretto pairs beautifully with white chocolate ganache for an elegant almond variation. When adding alcohol to your Homemade Chocolate Truffles, reduce the cream by an equal amount to maintain the proper consistency.
Flavor-Infused Ganache: Transform the basic recipe by infusing the cream before making your ganache. Steep loose-leaf Earl Grey tea, lavender buds, or crushed cardamom pods in the hot cream for 15 minutes, then strain before pouring over the chocolate. For spicy chocolate truffles, add a pinch of cayenne or 1/4 teaspoon of ground cinnamon to the ganache. Plant-based eaters can enjoy this treat by substituting full-fat coconut cream for dairy cream and using dairy-free chocolate—the technique remains identical while creating completely vegan chocolate truffles.
Storage and Serving
Store your Homemade Chocolate Truffles in an airtight container in the refrigerator, where they’ll maintain peak quality for up to two weeks. Place parchment paper between layers to prevent sticking. For longer storage, these chocolate truffles freeze beautifully for up to three months—simply thaw overnight in the refrigerator before serving.
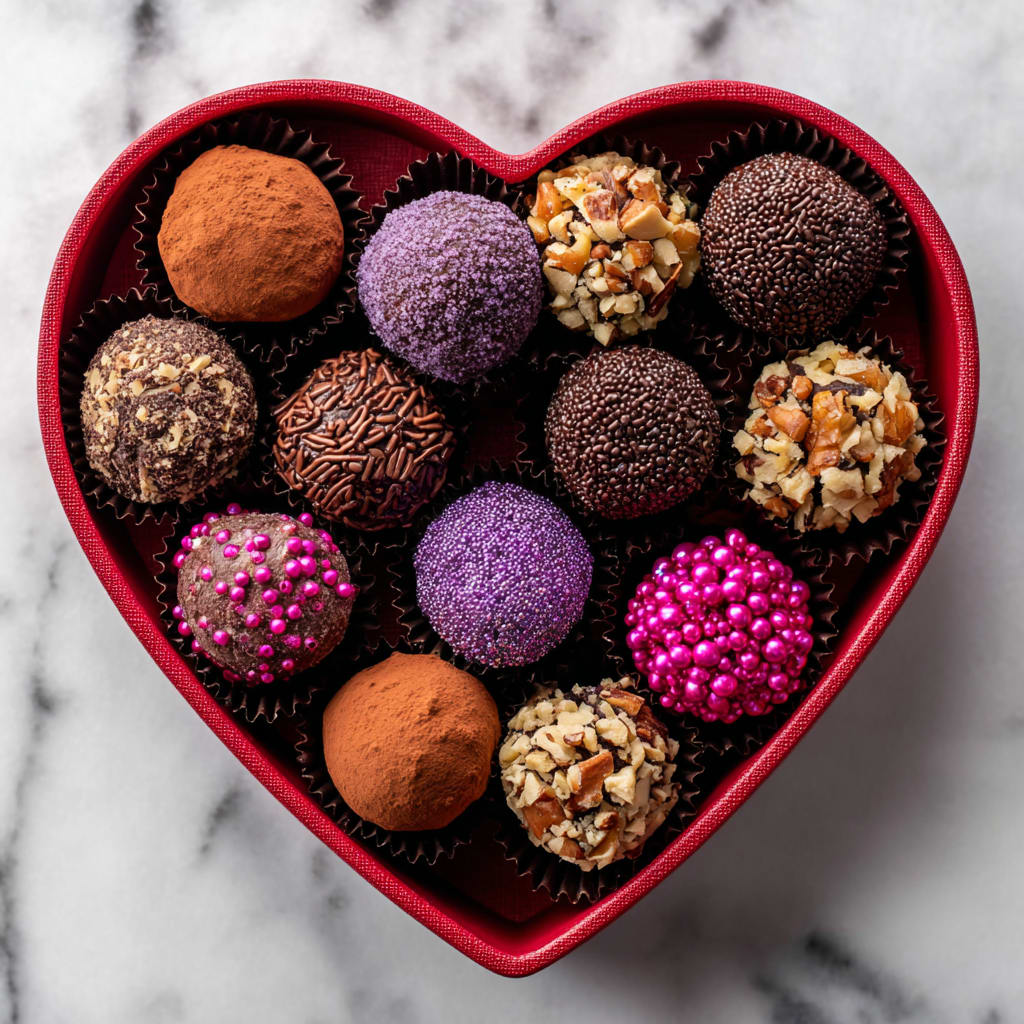
For an elegant presentation, arrange your truffles in miniature paper candy cups nested within a beautiful box lined with tissue paper—they make thoughtful handmade gifts for holidays and special occasions. Create a stunning dessert platter by serving these chocolate truffles alongside fresh berries, candied orange peel, and a small bowl of lightly whipped cream for dipping.
For a sophisticated dinner party finale, pair these rich chocolate truffles with complementary beverages: a vintage port highlights dark chocolate’s fruitiness, while a shot of espresso accentuates its intensity. For afternoon entertaining, serve alongside Earl Grey tea, whose bergamot notes create a perfect flavor harmony with the deep chocolate.
FAQs
Why did my ganache separate or become grainy?
Separation typically occurs when the ganache gets too hot. Always heat cream just until steaming, never boiling, and don’t microwave the ganache once formed. If it does separate, whisk in 1-2 teaspoons of warm milk until the mixture comes back together.
Can I make these truffles ahead for a special event?
Absolutely! Homemade Chocolate Truffles actually improve with 1-2 days of resting as flavors meld. Make them up to two weeks before your event and store in the refrigerator, or freeze for up to three months.
Why won’t my ganache set properly?
This usually indicates an improper chocolate-to-cream ratio. If your ganache seems too soft after 4+ hours of chilling, gradually incorporate additional melted and cooled chocolate until you reach the desired consistency.
How do I prevent my hands from getting messy while rolling truffles?
Wear food-safe gloves lightly dusted with cocoa powder. Alternatively, chill the ganache until very firm, work quickly with small portions, and wash hands under cold water between batches.
Can I use white chocolate for this recipe?
Yes, but adjust the ratio to 10 ounces of white chocolate to 1/2 cup cream, as white chocolate contains more cocoa butter and less cocoa solids than dark varieties.

Homemade Chocolate Truffles Recipe
- Prep Time: 20 minutes
- Cook Time: 5 minutes
- Total Time: 2 hours 25 minutes
- Yield: 24 truffles 1x
- Category: Dessert
- Method: chilling
- Cuisine: Americaine
Description
Indulge in rich Homemade Chocolate Truffles made with creamy ganache and rolled in cocoa powder. Decadent, easy, and irresistible!
Ingredients
- 8 oz (226g) high-quality semisweet chocolate, finely chopped
- 2/3 cup (160ml) heavy cream
- 1 tablespoon (14g) unsalted butter, room temperature
- 1/4 teaspoon pure vanilla extract
- 1/8 teaspoon sea salt
- 1/3 cup (40g) unsweetened cocoa powder
- 1/3 cup (40g) finely chopped nuts (pistachios, hazelnuts, or almonds work beautifully)
- 1/3 cup (40g) shredded coconut
- 8 oz (226g) additional chocolate for dipping (optional)
Instructions
- Step 1: Prepare the Chocolate Base Start by placing your finely chopped chocolate in a medium heatproof bowl. The smaller your chocolate pieces, the more evenly they’ll melt. In a small saucepan, heat the heavy cream over medium-low heat until it’s just steaming and tiny bubbles form around the edges. Immediately remove from heat and pour over the chocolate. Let this mixture sit undisturbed for 2-3 minutes to allow the chocolate to soften properly.
- Step 2: Create the Ganache Gently stir the chocolate and cream mixture, starting from the center and working outward in concentric circles until completely smooth and glossy. Avoid vigorous stirring which can introduce air bubbles. Once fully incorporated, add the room-temperature butter, vanilla extract, and salt. Stir until these ingredients are completely blended into your ganache. The mixture should look silky and homogeneous.
- Step 3: Chill the Mixture Cover the ganache directly with plastic wrap, ensuring the wrap touches the surface to prevent a skin from forming. Refrigerate for at least 2 hours or until the mixture is firm enough to scoop and hold its shape. For best results, leave it overnight—this resting period also enhances flavor development in your Homemade Chocolate Truffles.
- Step 4: Shape the Truffles Line a baking sheet with parchment paper. Prepare your coating ingredients in separate shallow dishes. Remove the ganache from the refrigerator and let it sit for 5 minutes to slightly soften. Using a teaspoon or small cookie scoop, portion out the ganache into roughly 1-inch balls. Quickly roll each portion between your palms to create smooth spheres, then immediately roll in your chosen coating until completely covered. Place each finished truffle on the prepared baking sheet.
- Step 5: Set and Store Return the coated truffles to the refrigerator for at least 15 minutes to set completely. Your Homemade Chocolate Truffles are now ready to enjoy! For the best texture and flavor experience, serve them slightly chilled but not completely cold—about 10 minutes at room temperature creates the perfect melt-in-your-mouth consistency.
Notes
Fresh ingredients will always yield the best flavor results.
Nutrition
- Serving Size: 1 truffle
- Calories: 102
- Sugar: 7g
- Sodium: 19mg
- Fat: 7g
- Saturated Fat: 4g
- Unsaturated Fat: 2g
- Trans Fat: 0g
- Carbohydrates: 8g
- Fiber: 1g
- Protein: 1g
- Cholesterol: 8mg