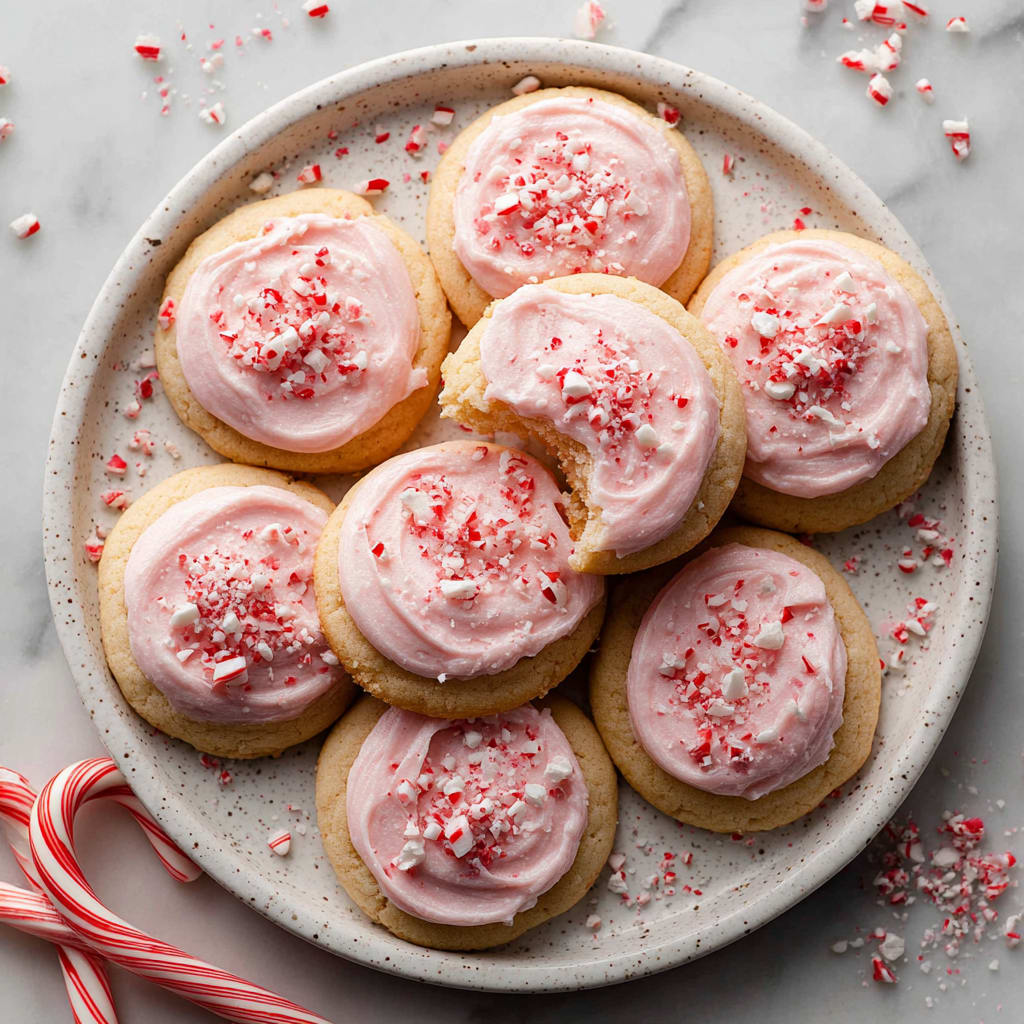
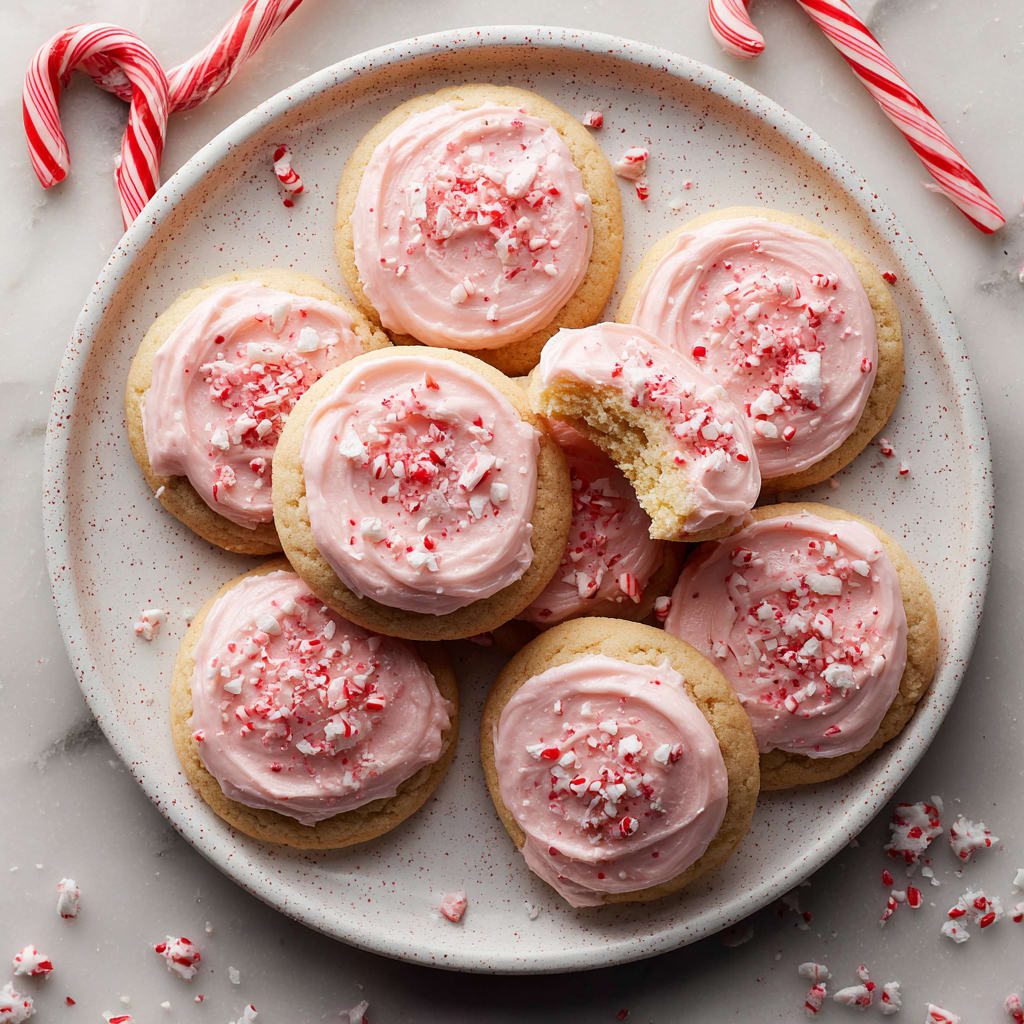
The moment these buttery Peppermint Meltaway Cookies touch your tongue, they dissolve into a cloud of sweet, minty bliss. These delicate, powdery confections strike the perfect balance between refreshing peppermint and melt-in-your-mouth shortbread texture, making them an irresistible holiday treat. Unlike ordinary cookies, these Peppermint Meltaway Cookies quite literally dissolve with each bite, creating a sensory experience that’s both comforting and exciting. You’ll learn how to create these festive cookies with a tender crumb, delicate peppermint flavor, and the signature powdered sugar coating that makes them a standout on any cookie platter.
Why You’ll Love This Recipe
There’s something magical about Peppermint Meltaway Cookies that keeps everyone reaching for just one more. Their delicate, crumbly texture gives way to a smooth, buttery finish that genuinely “melts away” while you’re eating them – a textural contrast that makes them uniquely satisfying. The subtle peppermint flavor provides refreshing coolness without overwhelming your palate, making these cookies the perfect balance of indulgent and refreshing.
What truly sets these cookies apart is their incredible simplicity. With just a handful of pantry staples and about 30 minutes of active preparation, you’ll create holiday cookies that look and taste like they required professional pastry skills. They’re forgiving for beginners yet impressive enough for seasoned bakers.
These peppermint delights are versatile too – perfect for holiday cookie exchanges, festive dessert platters, homemade gifts, or simply enjoying with a cup of hot chocolate on a cold winter evening. The delicate pink tint and snow-white coating make them as beautiful as they are delicious.
Ingredients
For the Peppermint Meltaway Cookies:
- 1 cup (226g) unsalted butter, softened
- ½ cup (60g) powdered sugar, plus more for coating
- 1 teaspoon peppermint extract
- 2-3 drops red food coloring (optional)
- 2 tablespoons (30ml) milk
- 2 cups (240g) all-purpose flour
- 1 tablespoon (7g) cornstarch
- ½ teaspoon salt
For the Peppermint Glaze:
- 1 cup (120g) powdered sugar
- 2-3 tablespoons (30-45ml) milk
- ¼ teaspoon peppermint extract
- Crushed candy canes for garnish (about ¼ cup)
The cornstarch is crucial for these holiday peppermint cookies as it creates that signature melt-in-your-mouth texture. Use pure peppermint extract (not mint or spearmint) for the most authentic flavor. The butter should be softened but not melted to achieve the proper dough consistency.
Pro Tips
Temperature Matters: The secret to perfect Peppermint Meltaway Cookies is in the butter’s temperature. For that signature tender crumb, your butter should be softened to room temperature (about 65-67°F). Too cold, and your cookies won’t spread correctly; too warm, and they’ll spread too much and lose their delicate texture. Test it by pressing your finger into the butter – it should leave an indent without sinking in completely.
Don’t Overmix: When combining your dry and wet ingredients, mix just until they’re incorporated. Overmixing develops gluten, which makes cookies tough rather than melt-in-your-mouth tender. Once the flour is added, use gentle folding motions and stop as soon as no dry patches remain in your peppermint cookie dough.
Chill for Success: Refrigerating the dough for at least 30 minutes before baking is non-negotiable for these cookies. This cooling period allows the butter to firm up, preventing excessive spreading and ensuring that perfect meltaway texture. If the dough feels too sticky when rolling, dust your hands with powdered sugar rather than flour to maintain the cookies’ delicate sweetness.
Instructions
Step 1: Prepare the Dough
In a large mixing bowl, cream the softened butter and powdered sugar together until light and fluffy, about 3-4 minutes. Don’t rush this step – the air incorporated here creates those tender pockets in your Peppermint Meltaway Cookies. Add the peppermint extract, milk, and optional food coloring (for festive pink cookies), mixing until well combined. The mixture should be smooth and uniform in color.
Step 2: Add Dry Ingredients
In a separate bowl, whisk together the flour, cornstarch, and salt. Gradually add this dry mixture to your butter mixture, stirring gently after each addition. You’ll notice the dough becoming increasingly thick and slightly sticky – that’s exactly what you want! Once combined, the dough should be soft but not overly sticky. If it seems too soft, add an additional tablespoon of flour.
Step 3: Chill the Dough
Cover your cookie dough with plastic wrap, pressing it directly onto the surface to prevent it from drying out. Refrigerate for at least 30 minutes, though chilling overnight works beautifully if you’re planning ahead. This resting period allows the flavors to meld and the dough to firm up to the perfect consistency for shaping.
Step 4: Shape and Bake
Preheat your oven to 350°F (175°C) and line two baking sheets with parchment paper. Remove the chilled dough and roll it into small balls, about 1 inch in diameter. Place them 2 inches apart on your prepared baking sheets. For the classic meltaway appearance, gently press down on each ball with the bottom of a glass to slightly flatten. Bake for 10-12 minutes until the bottoms are just barely golden and the tops remain pale. They won’t brown much on top – that’s normal for Peppermint Meltaway Cookies!
Step 5: Finish with Glaze and Garnish
While the cookies cool completely on a wire rack, prepare the peppermint glaze by whisking together powdered sugar, milk, and peppermint extract until smooth. Once cookies are fully cooled, drizzle or dip the tops in the glaze, then immediately sprinkle with crushed candy canes for a festive touch and extra peppermint flavor. Allow the glaze to set completely before storing – this takes about 1-2 hours at room temperature.
Variations
Chocolate Peppermint Meltaways: Transform your Peppermint Meltaway Cookies into a chocolate lover’s dream by adding 3 tablespoons of cocoa powder to your dry ingredients. The rich chocolate pairs beautifully with the cool peppermint flavor, creating an indulgent contrast. For an extra special touch, dip half of each baked cookie in melted dark chocolate and sprinkle with crushed candy canes.
Citrus Meltaways: Swap the peppermint extract for 1 tablespoon of fresh lemon, orange, or lime zest plus 1 teaspoon of the corresponding juice. This bright, refreshing variation makes these meltaway cookies perfect for spring and summer gatherings. Top with a simple citrus glaze using the same fruit juice instead of milk for an intensified flavor profile.
Gluten-Free Adaptation: Create gluten-free Peppermint Meltaway Cookies by substituting the all-purpose flour with a 1:1 gluten-free baking blend that contains xanthan gum. Add an extra tablespoon of cornstarch to ensure that signature melt-in-your-mouth texture isn’t compromised. The result is a tender, delicate cookie that everyone can enjoy, regardless of dietary restrictions.
Storage and Serving
These Peppermint Meltaway Cookies stay fresh in an airtight container at room temperature for up to 5 days. Layer them between sheets of parchment paper to prevent them from sticking together or damaging their delicate glaze. For longer storage, these cookies freeze beautifully for up to 3 months – simply thaw them at room temperature for about an hour before serving.
For a picture-perfect holiday dessert, arrange these cookies on a vintage cake stand surrounded by fresh mint leaves and small candy canes. They make a stunning centerpiece for holiday gatherings when stacked in a cookie tower with alternating layers of chocolate cookies.
Serve these delicate treats with complementary beverages like hot chocolate topped with whipped cream and crushed candy canes, or pair them with a peppermint mocha for an extra festive touch. For an elegant after-dinner option, these cookies also pair beautifully with coffee or a small glass of Baileys Irish Cream.
FAQs
Why did my cookies spread too much during baking?
If your Peppermint Meltaway Cookies spread excessively, your butter was likely too warm. Make sure to chill the dough for at least 30 minutes before baking, and if your kitchen is particularly warm, refrigerate the shaped cookies for 10 minutes before they go into the oven.
Can I make these cookies ahead of time for a cookie exchange?
Absolutely! You can prepare the dough up to 3 days ahead and keep it refrigerated, or freeze the shaped, unbaked cookies for up to a month. For fully baked cookies, wait to add the glaze until 1-2 days before serving for the freshest presentation.
My cookies seem too crumbly – what went wrong?
A crumbly texture in peppermint cookies usually indicates too much flour. Make sure you’re measuring flour correctly by spooning it into your measuring cup rather than scooping, which compacts the flour. The dough should be soft but hold together when pressed.
Can I use peppermint candy instead of extract?
Yes! Crush 3-4 peppermint candies or candy canes into a fine powder and add to your dry ingredients. This gives a more subtle flavor with beautiful specks of color throughout your meltaway cookies.
How can I make the peppermint flavor stronger?
For more pronounced peppermint flavor in your Peppermint Meltaway Cookies, increase the extract to 1½ teaspoons, but do so carefully – peppermint extract is potent! You can also add ¼ teaspoon of peppermint oil for a more intense cooling sensation.

Peppermint Meltaway Cookies
- Prep Time: 15 minutes
- Cook Time: 12 minutes
- Total Time: 45 minutes
- Yield: 24 cookies 1x
- Category: Dessert
- Method: Baking
- Cuisine: Americaine
Description
Peppermint Meltaway Cookies: Irresistibly soft and buttery cookies with a refreshing hint of peppermint. Perfect for holiday baking!
Ingredients
- 1 cup (226g) unsalted butter, softened
- ½ cup (60g) powdered sugar, plus more for coating
- 1 teaspoon peppermint extract
- 2–3 drops red food coloring (optional)
- 2 tablespoons (30ml) milk
- 2 cups (240g) all-purpose flour
- 1 tablespoon (7g) cornstarch
- ½ teaspoon salt
- 1 cup (120g) powdered sugar
- 2–3 tablespoons (30-45ml) milk
- ¼ teaspoon peppermint extract
- Crushed candy canes for garnish (about ¼ cup)
Instructions
- Step 1: Prepare the Dough In a large mixing bowl, cream the softened butter and powdered sugar together until light and fluffy, about 3-4 minutes. Don’t rush this step – the air incorporated here creates those tender pockets in your Peppermint Meltaway Cookies. Add the peppermint extract, milk, and optional food coloring (for festive pink cookies), mixing until well combined. The mixture should be smooth and uniform in color.
- Step 2: Add Dry Ingredients In a separate bowl, whisk together the flour, cornstarch, and salt. Gradually add this dry mixture to your butter mixture, stirring gently after each addition. You’ll notice the dough becoming increasingly thick and slightly sticky – that’s exactly what you want! Once combined, the dough should be soft but not overly sticky. If it seems too soft, add an additional tablespoon of flour.
- Step 3: Chill the Dough Cover your cookie dough with plastic wrap, pressing it directly onto the surface to prevent it from drying out. Refrigerate for at least 30 minutes, though chilling overnight works beautifully if you’re planning ahead. This resting period allows the flavors to meld and the dough to firm up to the perfect consistency for shaping.
- Step 4: Shape and Bake Preheat your oven to 350°F (175°C) and line two baking sheets with parchment paper. Remove the chilled dough and roll it into small balls, about 1 inch in diameter. Place them 2 inches apart on your prepared baking sheets. For the classic meltaway appearance, gently press down on each ball with the bottom of a glass to slightly flatten. Bake for 10-12 minutes until the bottoms are just barely golden and the tops remain pale. They won’t brown much on top – that’s normal for Peppermint Meltaway Cookies!
- Step 5: Finish with Glaze and Garnish While the cookies cool completely on a wire rack, prepare the peppermint glaze by whisking together powdered sugar, milk, and peppermint extract until smooth. Once cookies are fully cooled, drizzle or dip the tops in the glaze, then immediately sprinkle with crushed candy canes for a festive touch and extra peppermint flavor. Allow the glaze to set completely before storing – this takes about 1-2 hours at room temperature.
Notes
Fresh ingredients will always yield the best flavor results.
Nutrition
- Serving Size: 1 cookie
- Calories: 150
- Sugar: 7
- Sodium: 50
- Fat: 9
- Saturated Fat: 6
- Unsaturated Fat: 2
- Trans Fat: 0
- Carbohydrates: 16
- Fiber: 0.5
- Protein: 1
- Cholesterol: 25